Wie Sie mit Sculptris eigene Designs erstellen können.
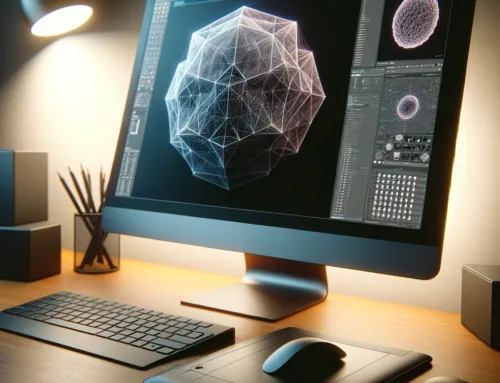
Das Erwerben von Designer-Skills kann Ihre Fähigkeiten enorm erweitern, aber der Einstieg in die 3D-Modellierung kann mit der Vielzahl der verfügbaren Werkzeuge und Techniken einschüchternd sein. In diesem Beitrag vermitteln wir Ihnen die Grundlagen des 3D-Sculptings mithilfe des Programms Sculptris.

3D Sculpting ermöglicht es Ihnen, sofort mit der Modellierung zu beginnen und dabei zusätzliche Werkzeuge und Techniken zu erlernen. Am Ende dieses Tutorials haben Sie alles, was Sie brauchen, um Ihre eigenen Designs zu erstellen und eine solide Grundlage, um weiter zu lernen.
Schritt 1: Idee
Die wichtigste Komponente des Designprozesses ist die Idee. Ohne einen Sinn für die allgemeine Form und das Gefühl Ihres Designs wird der Rest des Prozesses schwieriger. In diesem Tutorial werden wir einen Delphin entwerfen, da dieses Tier eine einfache Form hat, die es uns erlaubt, die Grundlagen des Sculptings zu vermitteln.
Die Erstellung einer Skizze Ihres Entwurfs ist immer eine gute Vorgehensweise. Für Anfänger ist ein Bleistift und Papier alles, was Sie brauchen, um die Hauptfunktionen Ihres Designs zu verbessern. Erfahrene Anwender erstellen Ihre Skizzen oft digital, um sie später als Referenzbilder zu verwenden. Für dieses einführende Tutorial werden wir uns an Bleistift und Papier halten, da Sculptris nicht die Möglichkeit hat, mehrere Referenzbilder zu importieren.
Schritt 2: Die allgemeine Form gestalten.
Alle Ihre Entwürfe in Sculptris beginnen als eine einfache Kugel, die geformt und verformt wird, um das endgültige Objekt herzustellen. Bevor wir mit der Modellierung beginnen, gehen wir die Grundkomponenten des Sculptris Interfaces durch.
Hauptsächliche Toolsets.
Hier werden Sie die meiste Zeit verbringen. Diese Werkzeuge können als Pinsel betrachtet werden, die Ihr Objekt auf verschiedene Weise verändern. Sie werden mit jedem von ihnen experimentieren wollen, um ein Gefühl für ihre Funktionen zu bekommen und das Erlernen der Hotkeys zu üben, da sie helfen werden, Ihre Arbeit erheblich zu beschleunigen.
Kostenloses Toolset.
Diese Werkzeuge modifizieren das Mesh nicht direkt, aber sie dienen jeweils einer einzigartigen Funktion, die den Designprozess unterstützt. Wir werden später im Tutorial auf einige dieser Tools eingehen, aber im Moment stellen Sie einfach sicher, dass Sie die Symmetrieoption aktiviert haben.
Datei-Optionen.
Toolset Modifikatoren.
Dieses obere Feld ändert die Einstellungen für das aktuell ausgewählte Werkzeug. Änderen Sie den Durchmesser Ihrer Bürste, die Stärke Ihrer Bürste und die Anzahl der Polygone, die sie hinzufügen. Wir werden näher darauf eingehen, warum es wichtig ist, Polygone später im Tutorial hinzuzufügen.
Nachdem Sie sich nun einen Überblick über die Sculptris-Oberfläche verschafft haben, werden wir uns direkt mit der Modellierung befassen. Im Idealfall haben Sie sich etwas Zeit genommen, um mit jedem der verschiedenen Werkzeuge zu experimentieren und ein Gespür für deren Funktionen zu haben.
Dieses Fenster ermöglicht es Ihnen, Geometrie hinzuzufügen sowie Dateien zu importieren und zu exportieren.
Um mit der Erstellung unseres Delphins zu beginnen, verwenden wir das Greifwerkzeug, um unser Objekt zu formen. Es ist gut für diesen Schritt, alle Toolset-Modifikatoren im mittleren Bereich zu halten. Nehmen Sie sich etwas Zeit, um die Kugel in die allgemeine Form Ihres Objekts zu formen. Wir haben Referenzbilder eines Delphins hochgeladen und unserer Papier-Skizze von früher für diesen Schritt verwendet. Sobald Sie die allgemeine Form haben, glätten Sie unebene Bauteile mit den Werkzeugen „Bewegen“ und „Abflachen“. Am Ende sollten Sie eine Form haben, die ungefähr dem Körper eines Delphins ähnelt.
Als nächstes entwerfen wir die Fins und beginnen, den Kopf zu formen. Dazu werden wir weiterhin das „Grab“-Tool verwenden, aber wir werden die Größe unserer Bürste reduzieren. Ziehen Sie weitere Referenzbilder hoch und beginnen Sie, die Heckflosse zu formen. Die Aktivierung der Symmetrie erleichtert diesen Prozess erheblich und ermöglicht es uns, schneller zu visualisieren, ob die Lamellen richtig geformt sind.
Sobald Sie die Schwanzflosse entworfen haben, gehen Sie nach oben zur Rückenflosse. Verwenden Sie das „Greifwerkzeug“, um die allgemeine Form zu formen. Standardmäßig ist diese viel dicker als die Rückenflosse eines echten Delphins. Um sie auszudünnen, wechseln Sie zur Draufsicht und ziehen Sie die Rückenflosse mit dem Greifwerkzeug nach innen.
Als nächstes gehen wir zu den Brustflossen, wo wir ein neues Konzept vorstellen, das Maskieren. Halten Sie Ihre Steuertaste gedrückt und zeichnen Sie die Basis der Rückenflosse. Sie werden einen drunkelgrauen Schatten sehen, der Ihre Maske ist. Alles, was dunkelgrau schattiert ist, wird nicht durch Änderungen an Ihrem Mesh beeinflusst. In diesem Fall wollen wir die Flossen herausziehen, als drücken Sie Strg + i, um Ihre Maske umzukehren. Jetzt können Sie mit dem Greifwerkzeug nur noch den Abschnitt für Ihre Rückenflosse herausziehen.
Für den letzten Kieferabschnitt des Delphins verwenden wir eine Maske, um den oberen Teil des Kopfes zu beschatten. Ziehen Sie das untere Baking-Teil mit dem „Greifwerkzeug“ heraus. Bereinigen Sie alle unebenen Abschnitte Ihres Modells mit den Werkzeugen „Abflachen“ und „Greifen. Nun sind Sie bereit, Details hinzuzufügen.
Schritt 3: Hinzufügen von Details.
Wenn Sie den Wireframe-Modus aktiviert hatten (schalten Sie diesen mit der Taste w ein), haben Sie vielleicht bemerkt, das Ihr Modell aus einer Reihe von Dreiecken besteht und das Hinzufügen von Features oder das Modifizieren der Geometrie Dreiecke zu Ihrem Mesh hinzufügt. Die Anzahl der Dreiecke, die zu Ihrem Mesh hinzugefügt werden, wurde über den Detail-Slider im Bereich der Toolset-Modifikatoren gesteuert.
Dreiecke werden besonders wichtig, wenn es darum geht, komplizierte Details in Designs einzufügen. Die Modellierung erfolgt durch Manipulation der Position der Eckpunkte von Dreiecken, so dass mehr Dreiecke einen höheren Detallierungsgrad ermöglichen. Für jedes dieser Features sollten wir sicherstellen, dass der Detailregler nahe 75% seines Maximalwerts liegt, um sicherzustellen, dass die Features gut aufgelöst werden.
Für den Mund verwenden wir ein neues Werkzeug mit der Bezeichnung „Crease“ und fügen damit Ihrem Mesh einen Kanal hinzu. Ziehen Sie ein Referenzbild hoch und zeichnen Sie eine Falte für den Mund des Delphins. Sie können die Größe der Falte mit dem Diameter-Slider in Ihrem Toolset Modifikatoren-Panel anpassen und die Symmetrie spiegelt dies für beide Seiten wider. Verwenden Sie das Werkzeug „Greifen“, um die Positionierung Ihrer Falte zu ändern, wenn es zu Beginn etwas uneben ist.
Um die Augenhöhlen herzustellen, verwenden wir das Faltwerkzeug mit dem Power-Slider auf max. Wählen Sie im Bereich Dateioptionen die Optionen „Neue Kugel“ und anschließend „Objekt hinzufügen“. Dies erzeugt eine neue Kugel und spiegelt sie auf beiden Seiten des Objekts wider. Skalieren Sie die Kugel mit dem Skalierungswerkzeug Ihres Hauptwerkzeugsatzes auf ihre Größe und bewegen Sie diesen in den Sockel.
Jetzt ist unser Delphin einsatzbereit und wir kommen damit zum Ausdrucken.
Ausdrucken.
Sculpting wird am häufigsten eingesetzt, um komplizierte und hochdetaillierte Objekte zu schaffen. Ein hochauflösendes Druckverfahren wie die Stereolithographie ist am besten geeignet, um sicherzustellen, dass alle Details aus Ihrem Modell aufgelöst werden. Für unseren Delphin verwenden wir Form 2 und Grauharz V3. Sehen Sie sich die folgenden Ergebnisse an und fordern Sie ein Form 2 Musterteil an, um ein Gefühl für die Qualität von SLA zu bekommen.
Wir hoffen, dass wir Ihnen einen ersten kurzen Einblick in die Thematik bieten konnten. Wenn Sie noch Fragen oder Anregungen haben sollten, hinterlassen Sie uns unten einen Kommentar.
Vielen Dank für Ihren Besuch.


