Wie Sie Ihre PlayStation VR erfolgreich einrichten.
In dem folgenden Beitrag möchten wir Ihnen Schritt für Schritt erklären, wie Sie Ihre PlayStation VR erfolgreich in Betrieb nehmen.

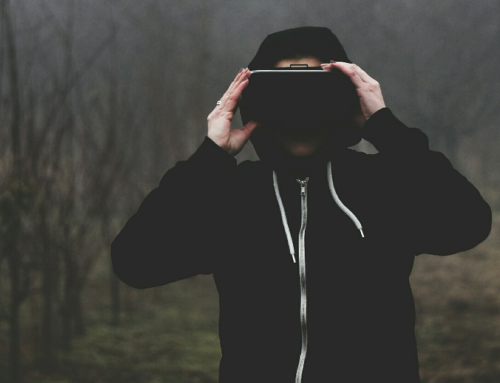
Virtual Reality (VR) ist endlich Mainstream mit beeindruckenden Headsets wie dem HTC Vive, Oculus Rift und natürlich die PlayStation VR, die jetzt bei einer Reihe von Händlern verfügbar sind. Die Welt der VR ist zweifelsohne sehr spannend, aber der Einrichtungsprozess macht die Dinge schon ein wenig kompliziert. Es ist schon recht komplex, die verschiedenen Kabel korrekt zuordnen zu können.
PlayStation VR Checkliste.
Dieser Artikel macht durchaus Sinn, da Sonys PlayStation VR Box nicht alle Komponenten beinhaltet, die Sie zum Spielen von PlayStation VR benötigen.
Tatsächlich enthält das Standard-Paket nicht einmal die PlayStation-Kamera, die für die PSVR-Nutzung unerlässlich ist. Zusammenfassend lässt sich sagen, dass Sie hier alles finden, was Sie zum Abspielen von PlayStation VR-Spielen benötigen.
- PlayStation VR Bundle (Headset, Prozessoreinheit, Kopfhörer, HDMI-Kabel, USB-Kabel, Netzteil und Kabel, PSVR Headset-Anschlussadapter)
- PlayStation Kamera
- PlayStation 4/PlayStation 4 Pro
- PlayStation Controller x2 (optional)
- Sony Dualshock 4 Controller
So richten Sie Ihre PlayStation VR ein.
Das erste, was Ihnen beim Öffnen der PlayStation VR-Box auffallen sollte, ist, wie viele Komponenten es gibt – und dazu gehören nicht die PlayStation 4, PlayStation Kamera oder die Move Batons, die alle separat erhältlich sind. Es ist wichtig zunächst einen Anfang zu finden.
Identifizieren Sie die Prozessoreinheit (Black Box) und schieben Sie die Abdeckung so, dass die hinteren Anschlüsse sichtbar sind. Nehmen Sie das mitgelieferte HDMI-Kabel und stecken Sie es in den HDMI-Ausgang Ihrer PS4 und stecken Sie das andere Ende in den Anschluss der Prozessoreinheit mit der Bezeichnung „HDMI PS4“. Schließen Sie das zweite HDMI-Kabel an Ihren Fernseher an, während das andere Ende an den Anschluss „HDMI-TV“ der Prozessoreinheit angeschlossen ist.
Suchen Sie das mitgelieferte USB-Kabel und stecken Sie die Micro-USB-Seite (kleine Seite) in die Rückseite der Prozessoreinheit. Stecken Sie das andere Ende des USB-Kabels in einen USB-Anschluss an der PS4 – beachten Sie, dass die PS4 Pro über einen zusätzlichen USB-Anschluss an der Rückseite verfügt, ideal für die Verwendung mit dem PSVR.
Schließen Sie das Wechselstromnetzteil an die Prozessoreinheit an und verbinden Sie es mit einer Steckdose.
Suchen Sie das VR-Headset-Verbindungskabel und stecken Sie das VR-Headset-Verbindungskabel an die Vorderseite der Prozessoreinheit und achten Sie darauf, dass die Symbole übereinstimmen, um eine korrekte Ausrichtung zu erreichen. Stecken Sie das VR-Headset in das andere Ende des Verbindungskabels und vergewissern Sie sich erneut, dass die Symbole des Kabels und des entsprechenden Ports übereinstimmen.
Nun ist das VR-Headset angeschlossen, der nächste Schritt ist der Anschluss der PlayStation-Kamera (nicht mitgeliefert). Schließen Sie das PlayStation-Kamerakabel an den entsprechenden Anschluss auf der Rückseite der PS4 an und platzieren Sie die Kamera auf oder unmittelbar über dem Fernseher, wobei Sie darauf achten müssen, dass keine Hindernisse den Blick auf den Raum behindern.
Nachdem alle Komponenten nun an Ihre PS4 abgeschlossen sind, ist es an der Zeit, die Konsole einzuschalten. Folgen Sie nach dem Einschalten den Anweisungen auf dem Bildschirm, um Ihren Spielbereich zu konfigurieren und die Erstinstallation des VR-Systems abzuschließen.
Sobald dies erledigt ist, sollten Sie bereit sein, in VR spielen zu können. Wenn Sie Move Batons gekauft haben, schließen Sie einfach das mitgelieferte USB-Kabel an die PS4 und jeden Baton an und drücken Sie die PlayStation-Taste, um sie anzuschließen.
Damit haben Sie Ihre PlayStation VR erfolgreich eingerichtet und jetzt steht großartigen VR-Erlebnissen nichts mehr im Weg.
Vielen Dank für Ihren Besuch.